---
title: Tenant Management
description: Manage tenants, login methods, and multi-factor authentication using the tenant management dashboard.
sidebar:
order: 4
---
## Overview
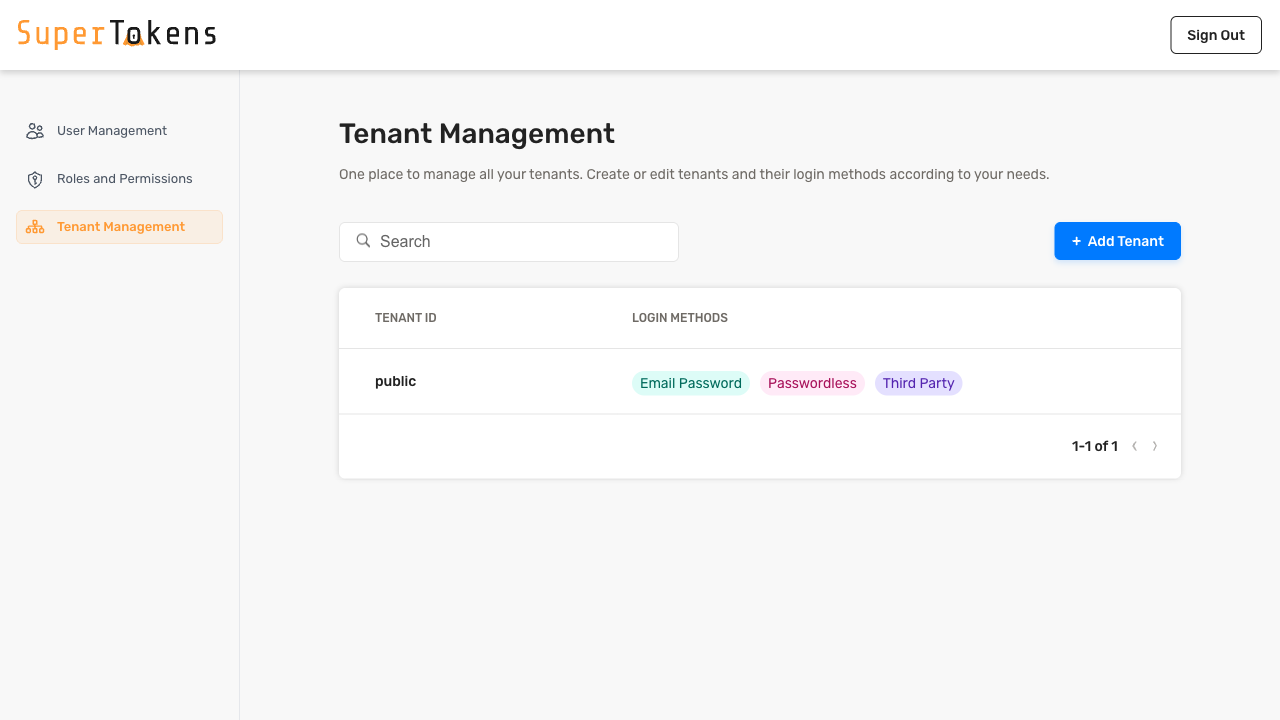
This page shows you what actions you can perform on tenants through the dashboard.
:::info[Caution]
This is only available with Node and Python SDKs.
:::
 ---
## Create a new tenant
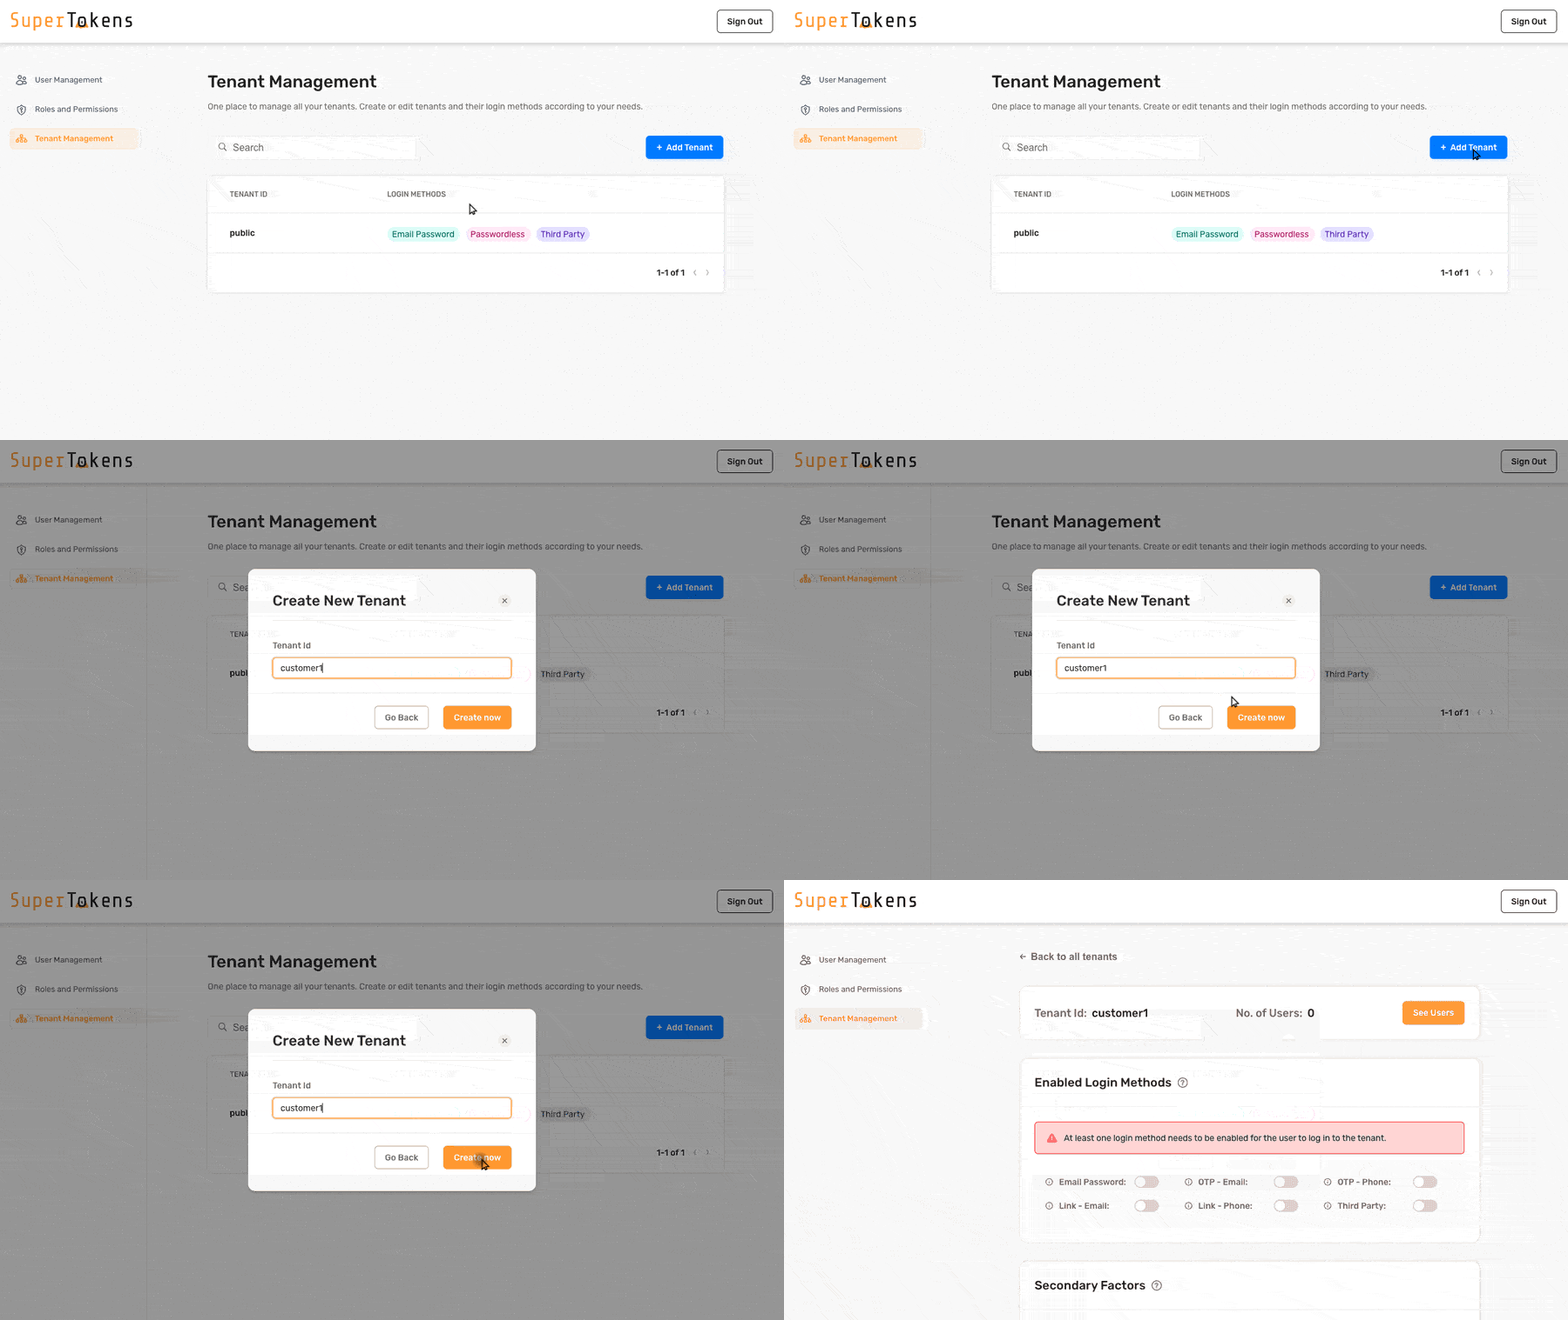
Clicking on `Add Tenant` prompts you to enter the tenant id. Once you enter the tenant id, click on `Create Now` to create the tenant. You then proceed to the Tenant Details page where you can further manage the newly created tenant.
---
## Create a new tenant
Clicking on `Add Tenant` prompts you to enter the tenant id. Once you enter the tenant id, click on `Create Now` to create the tenant. You then proceed to the Tenant Details page where you can further manage the newly created tenant.
 ## View tenant details
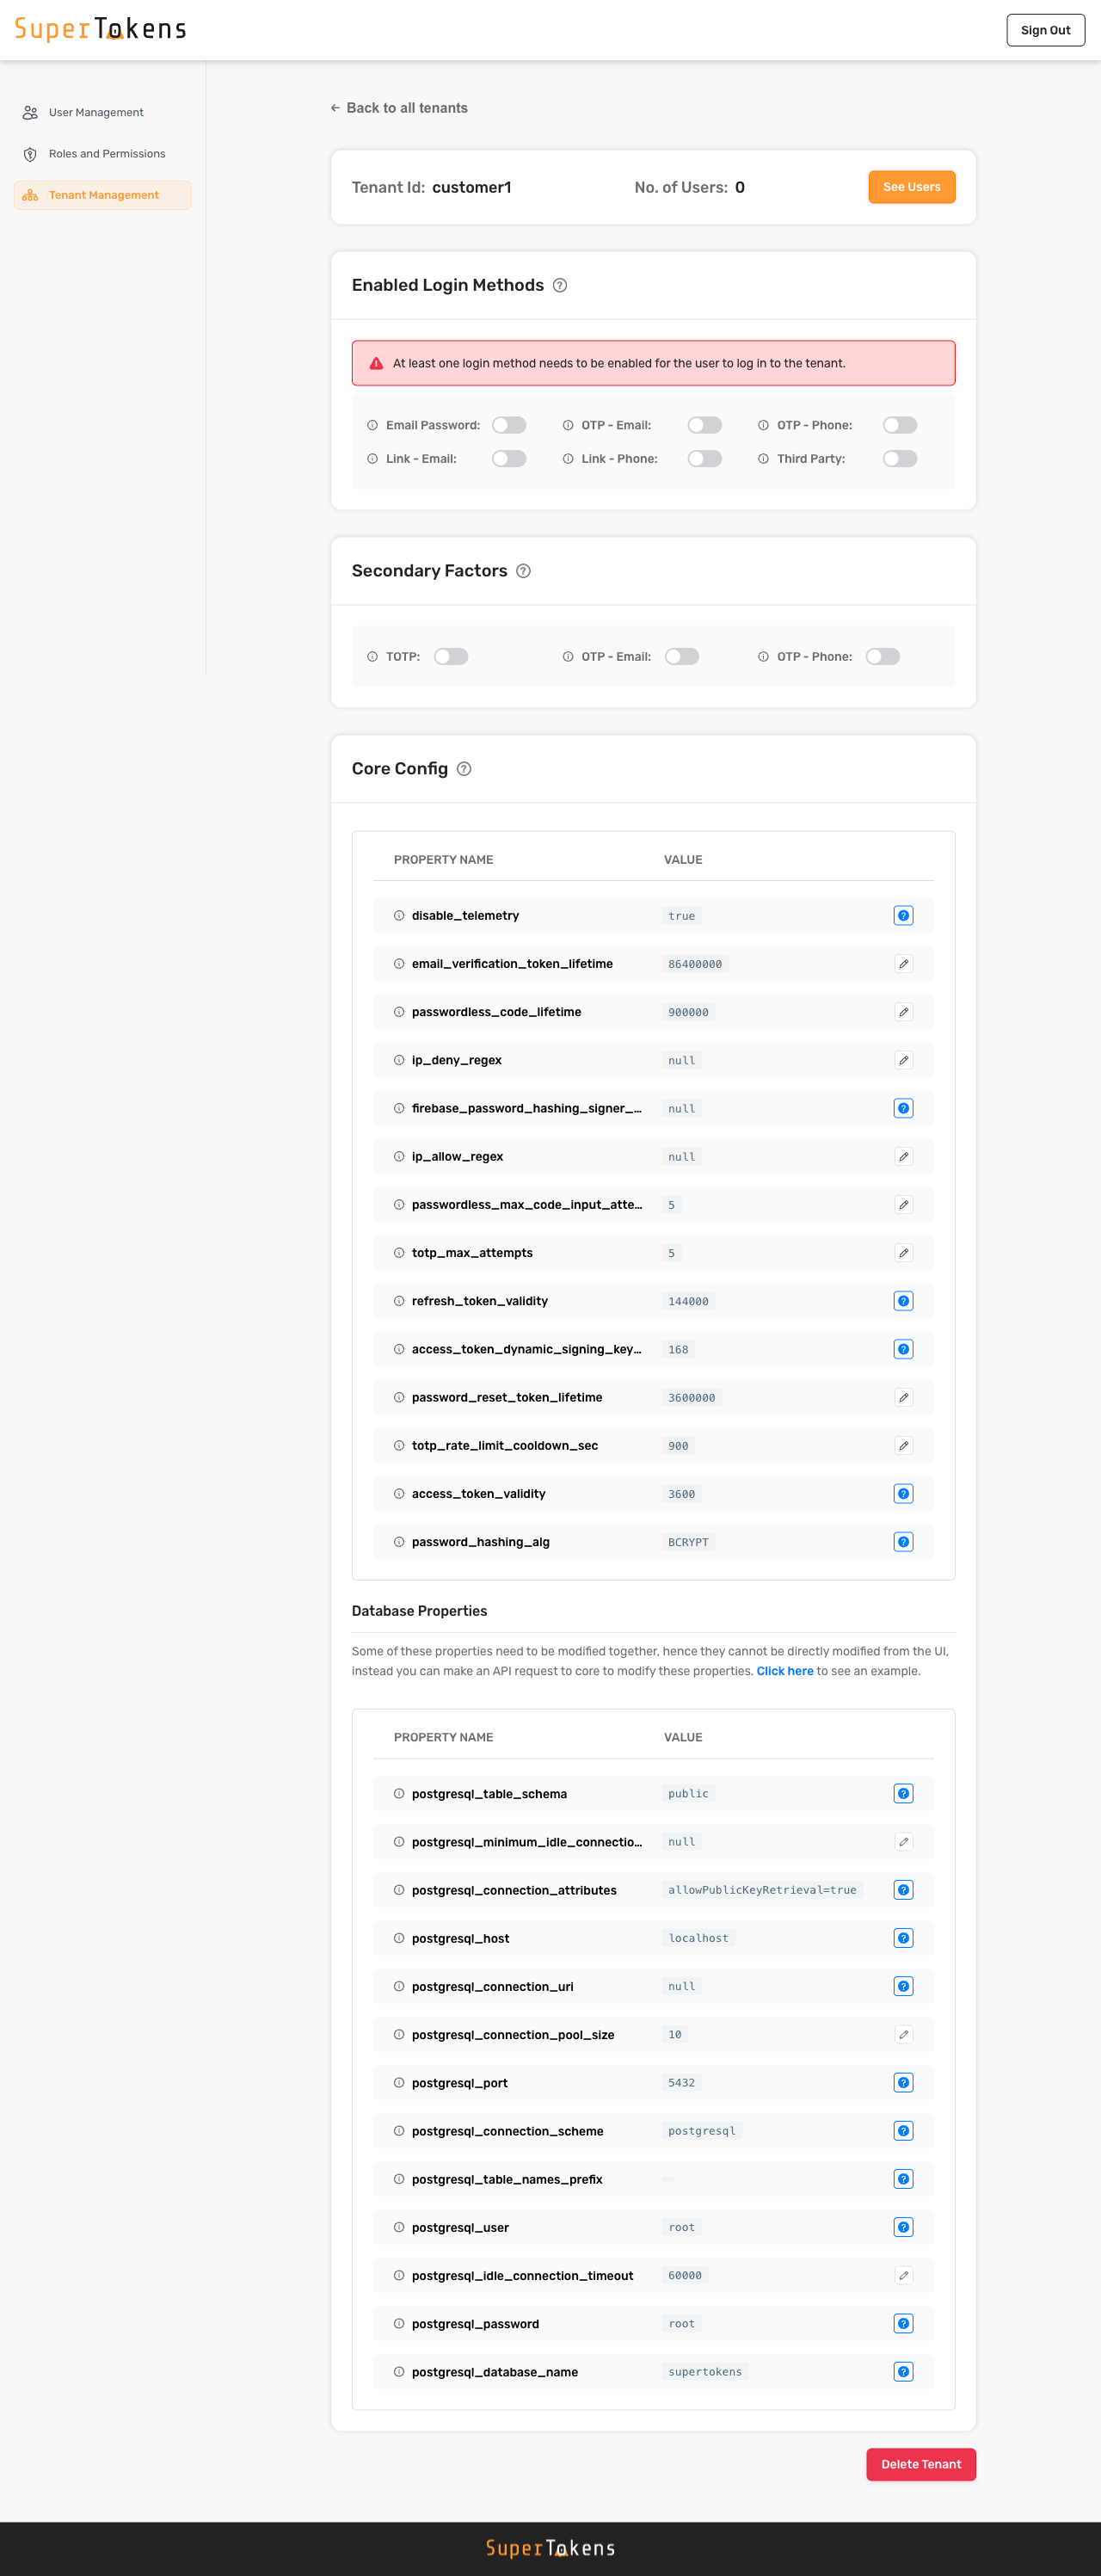
Upon selection or creation of a tenant, the Tenant Details page appears. The sections appear below.
## View tenant details
Upon selection or creation of a tenant, the Tenant Details page appears. The sections appear below.
 ### Tenant ID and users
The first section shows the tenant ID and the number of users in that tenant. Clicking on `See Users` takes you to the [user management page](/post-authentication/dashboard/user-management) where you can view and manage the users for the selected tenant.
### Tenant ID and users
The first section shows the tenant ID and the number of users in that tenant. Clicking on `See Users` takes you to the [user management page](/post-authentication/dashboard/user-management) where you can view and manage the users for the selected tenant.
 ### Enabled login methods
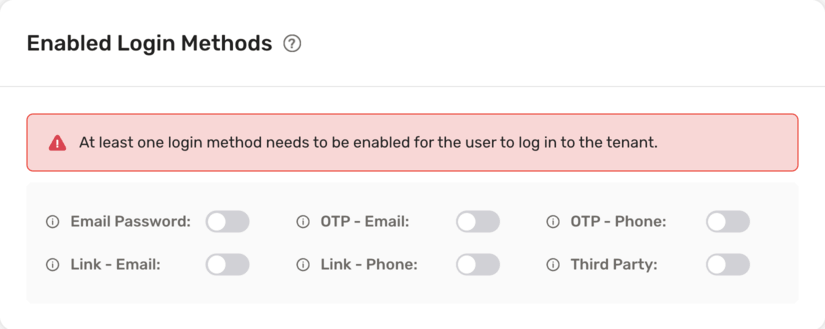
This section displays the login methods available for the tenant. By enabling these toggles, you can make the corresponding login methods accessible to the users within the tenant.
Appropriate recipes must be active to turn on the login methods. For example,
- to turn on `emailpassword`, initialize the EmailPassword recipe in the backend.
- to turn on `OTP Phone`, initialize the Passwordless recipe with `flowType` `USER_INPUT_CODE` and contactMethod `PHONE`
:::info
If you are using the Auth React SDK, make sure to enable `usesDynamicLoginMethods` in your tenant configuration to ensure the frontend automatically shows the login methods based on the selection here. See [tenant configuration](/authentication/enterprise/manage-tenants) for details.
:::
### Enabled login methods
This section displays the login methods available for the tenant. By enabling these toggles, you can make the corresponding login methods accessible to the users within the tenant.
Appropriate recipes must be active to turn on the login methods. For example,
- to turn on `emailpassword`, initialize the EmailPassword recipe in the backend.
- to turn on `OTP Phone`, initialize the Passwordless recipe with `flowType` `USER_INPUT_CODE` and contactMethod `PHONE`
:::info
If you are using the Auth React SDK, make sure to enable `usesDynamicLoginMethods` in your tenant configuration to ensure the frontend automatically shows the login methods based on the selection here. See [tenant configuration](/authentication/enterprise/manage-tenants) for details.
:::
 ### Secondary factors
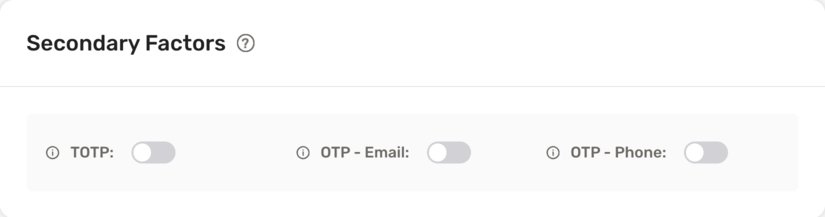
This section displays the secondary factors available for the tenant. By enabling these toggles, the corresponding factor becomes active for all users of the tenant. Refer to [MultiFactor Authentication docs](/additional-verification/mfa/introduction) for more information.
[MultiFactorAuth](/additional-verification/mfa/initial-setup) recipe must initialize to enable Secondary Factors.
Also, initialize appropriate recipes in the backend SDK to use a secondary factor. For example,
- to turn on TOTP, initialize the TOTP recipe in the backend.
- to turn on `OTP Phone`, initialize the Passwordless recipe with `flowType` `USER_INPUT_CODE` and contactMethod `PHONE`
### Secondary factors
This section displays the secondary factors available for the tenant. By enabling these toggles, the corresponding factor becomes active for all users of the tenant. Refer to [MultiFactor Authentication docs](/additional-verification/mfa/introduction) for more information.
[MultiFactorAuth](/additional-verification/mfa/initial-setup) recipe must initialize to enable Secondary Factors.
Also, initialize appropriate recipes in the backend SDK to use a secondary factor. For example,
- to turn on TOTP, initialize the TOTP recipe in the backend.
- to turn on `OTP Phone`, initialize the Passwordless recipe with `flowType` `USER_INPUT_CODE` and contactMethod `PHONE`
 ### Core configuration
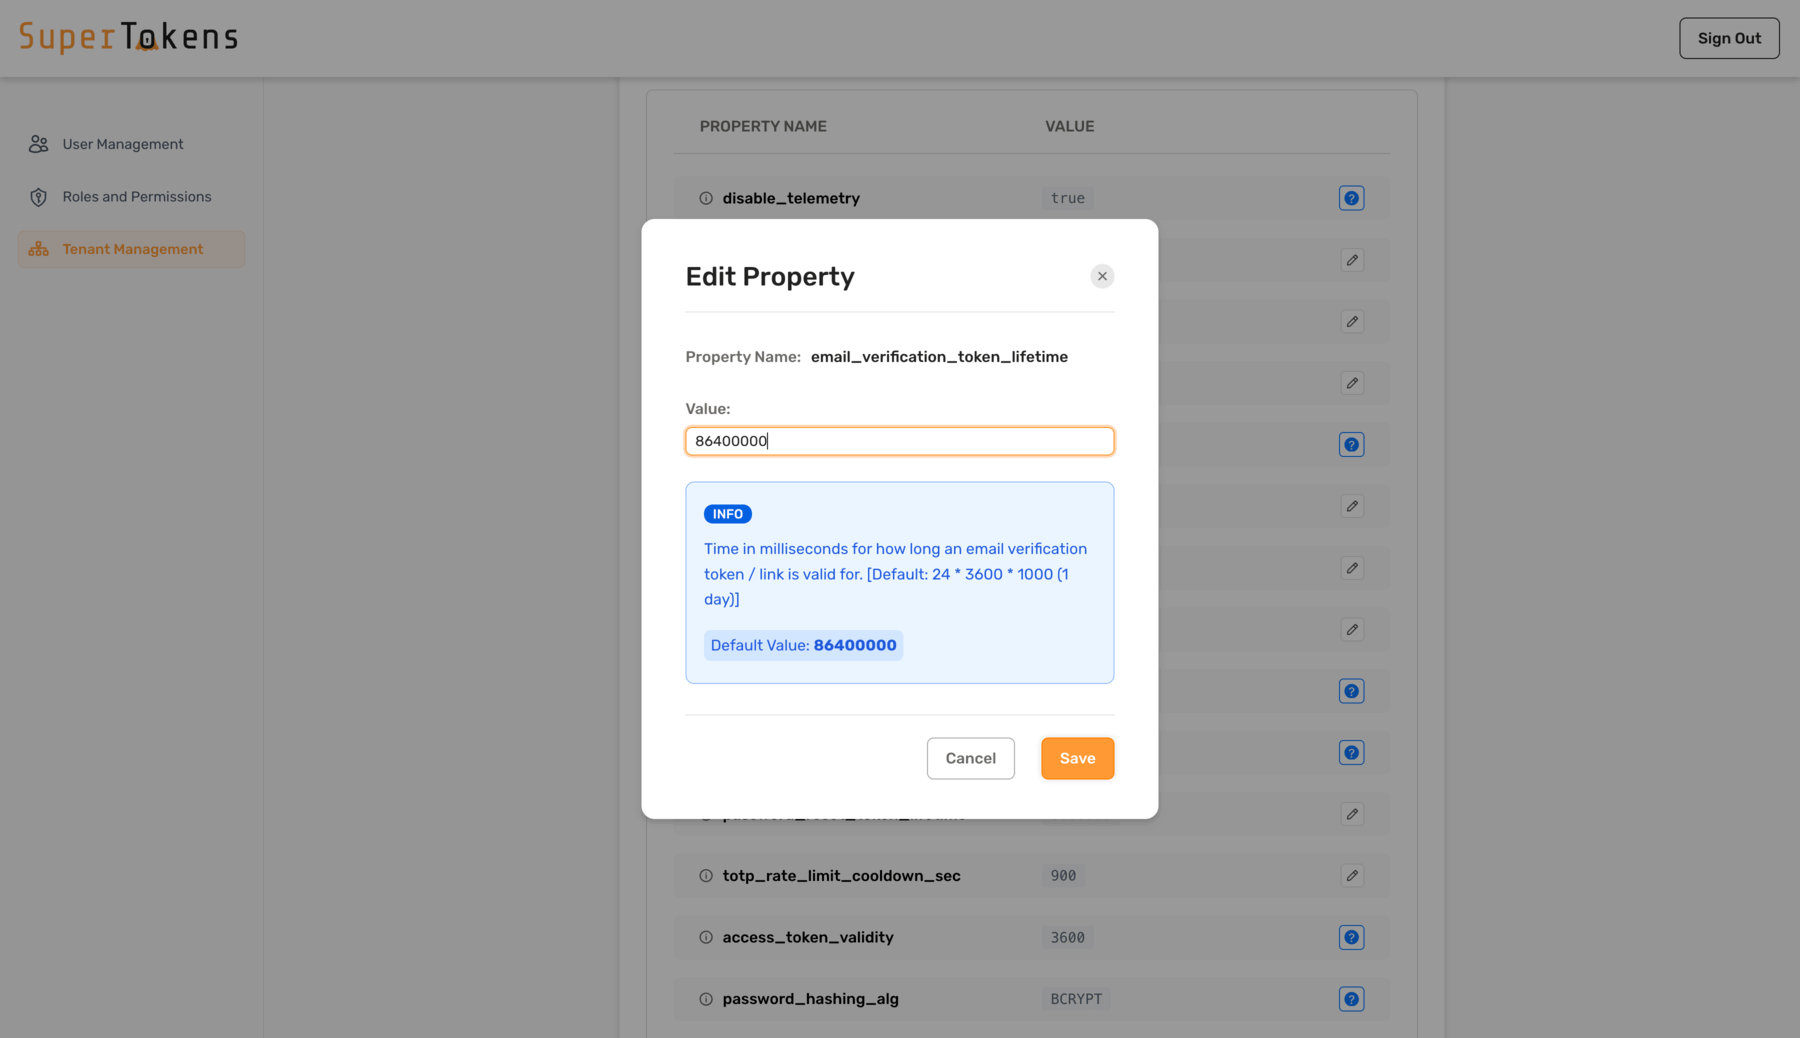
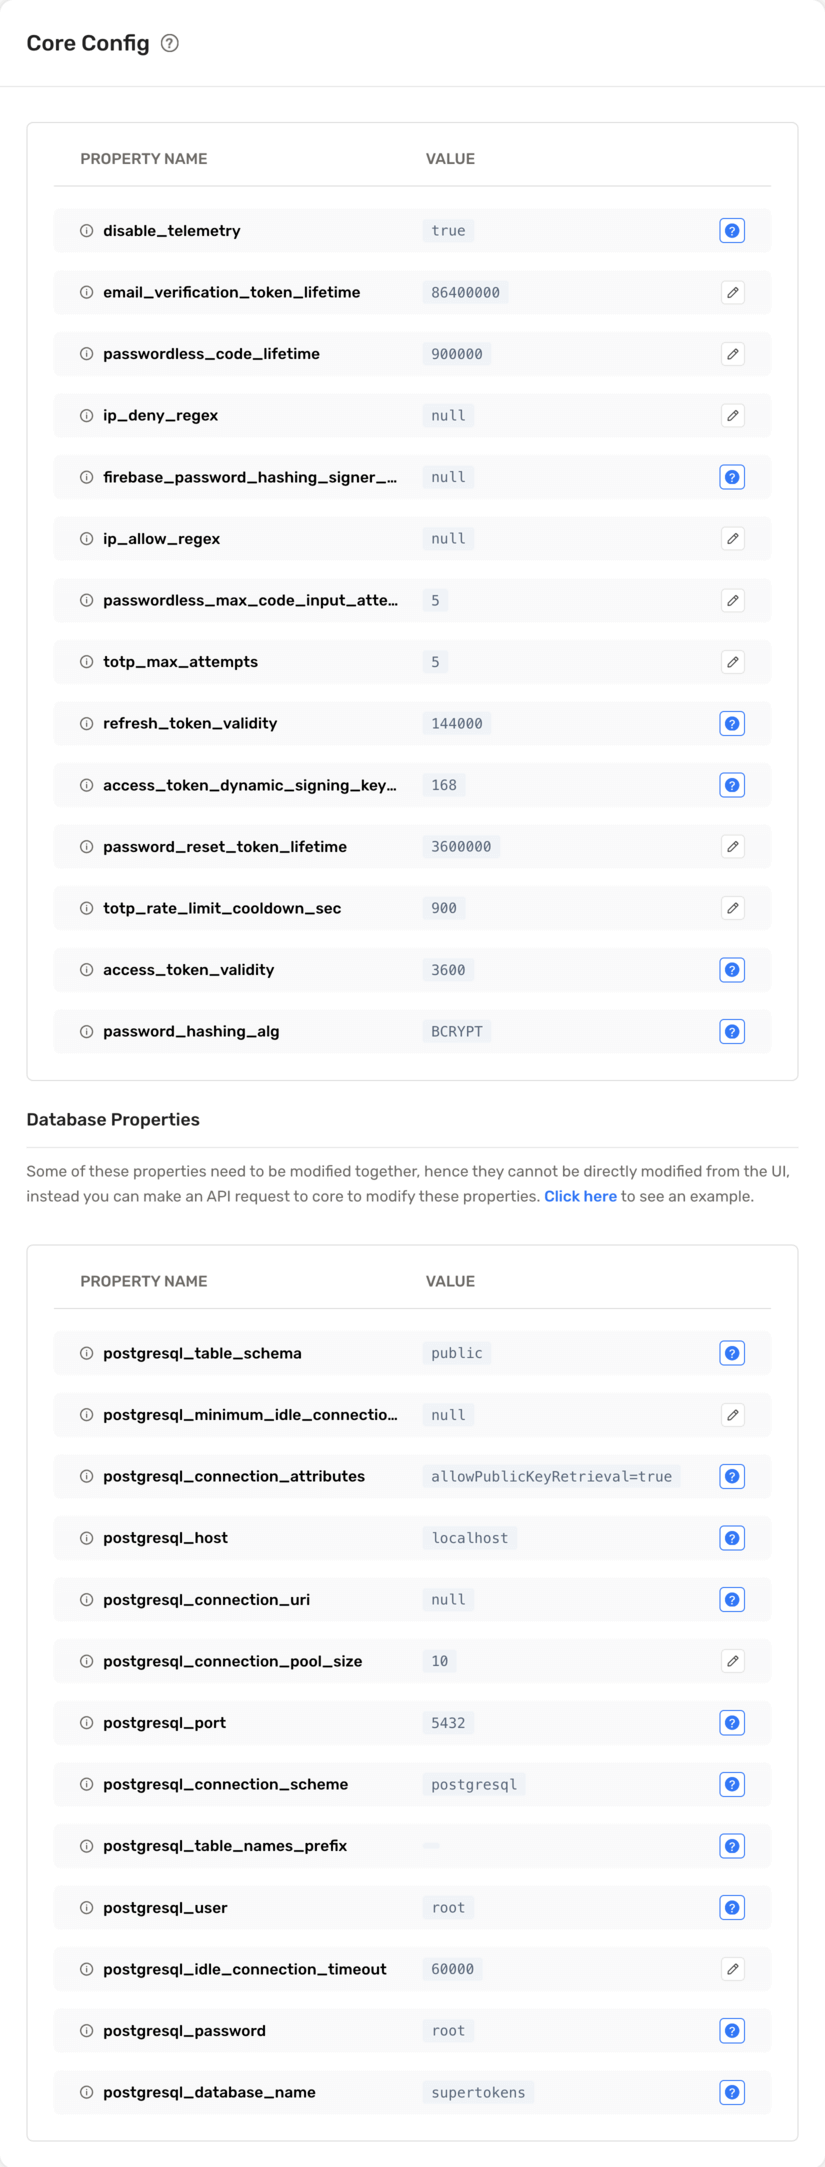 This section shows the current configuration values in core for the tenant. You can edit some of these settings by clicking the `pencil` icon next to the property.
 :::warning[Some configuration values may not be editable since they inherit from the App. If using SuperTokens managed hosting, you can modify deployment-level values on the **Configuration** page in the SaaS Dashboard. Else, if you are self-hosting the SuperTokens core, edit them via Docker environment variables or the `configuration.yaml` file.]
:::
---
## Manage `ThirdParty` providers
The Social/Enterprise providers section becomes available once `Third Party` login method is active for the tenant.
Initially, configure a new provider.
:::warning[Some configuration values may not be editable since they inherit from the App. If using SuperTokens managed hosting, you can modify deployment-level values on the **Configuration** page in the SaaS Dashboard. Else, if you are self-hosting the SuperTokens core, edit them via Docker environment variables or the `configuration.yaml` file.]
:::
---
## Manage `ThirdParty` providers
The Social/Enterprise providers section becomes available once `Third Party` login method is active for the tenant.
Initially, configure a new provider.
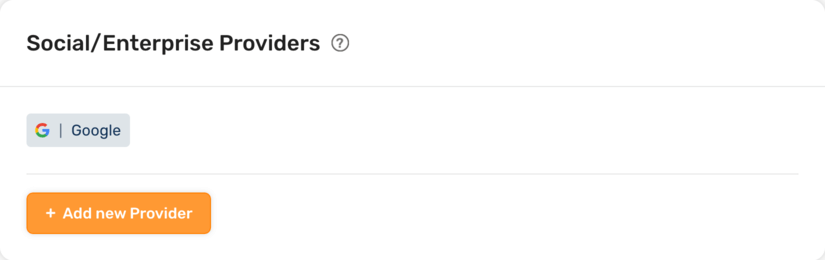
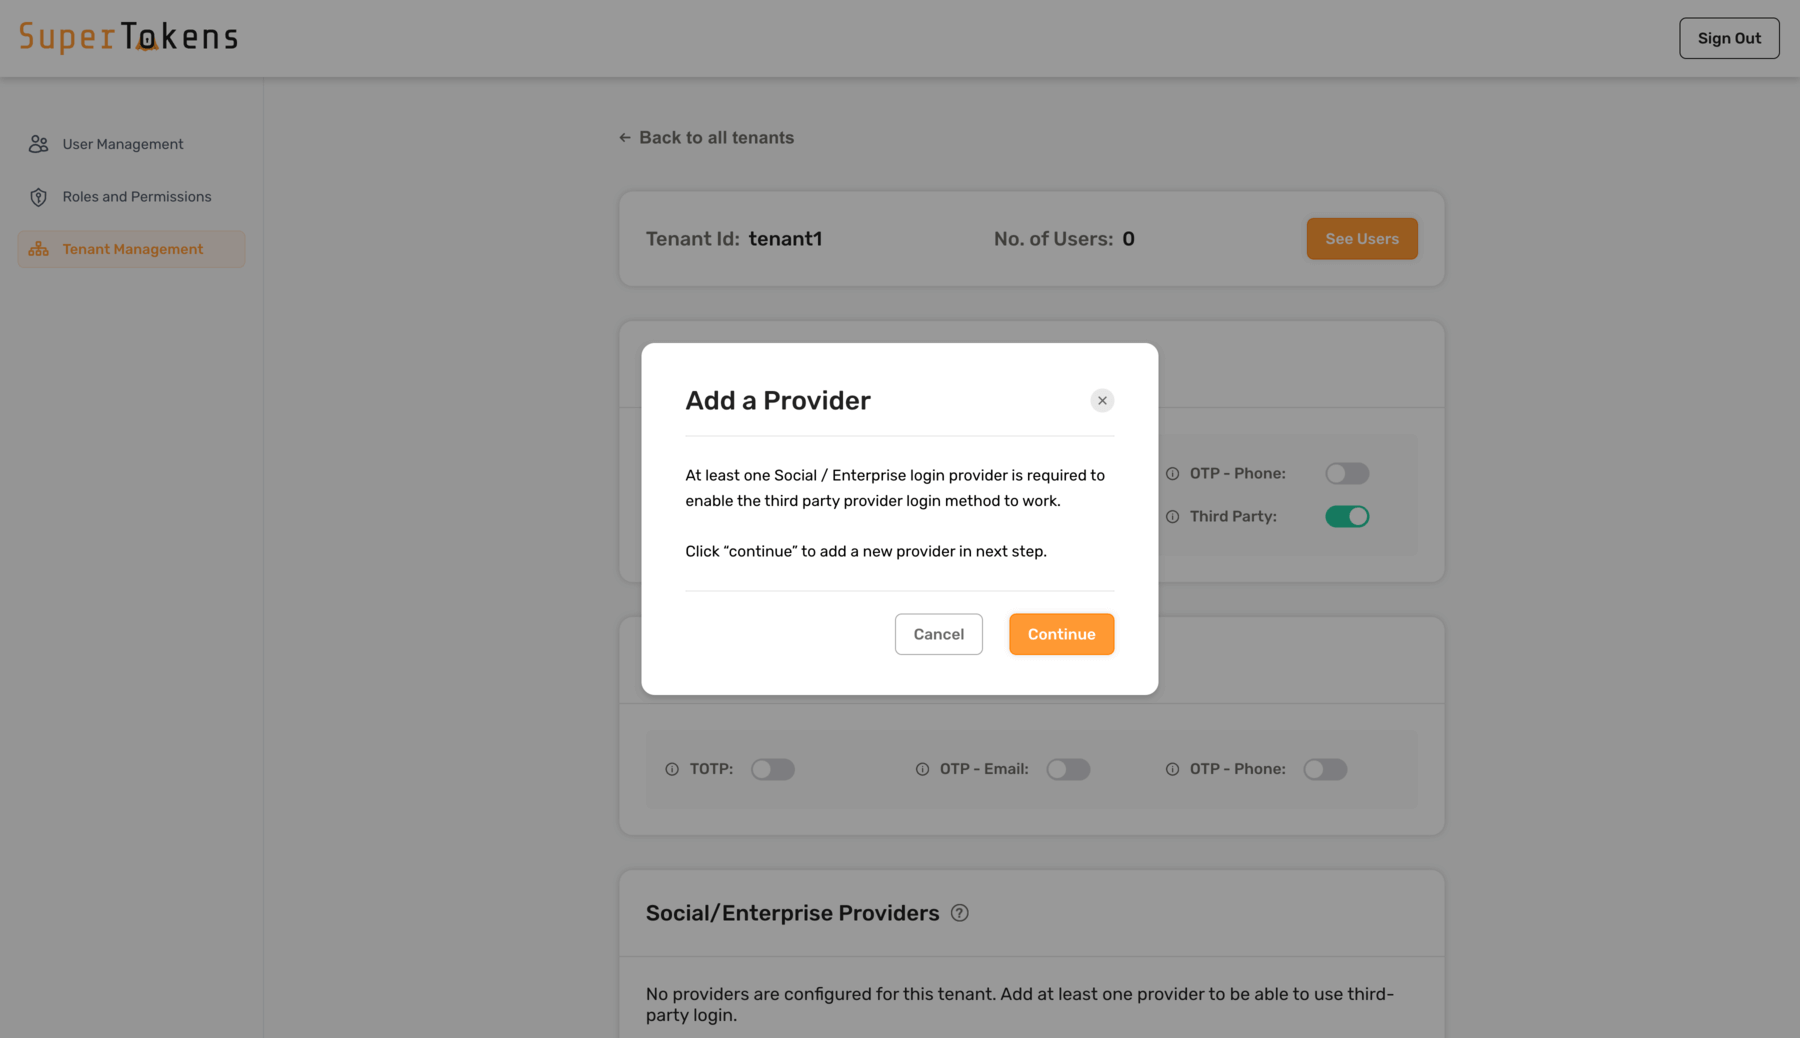 Later on, you can configure new or existing third-party providers from the **Social/Enterprise providers** section.
 ### Configure a new provider
When adding a new third-party provider, you receive a list of available options, including built-in enterprise and social providers, custom, and SAML.
### Configure a new provider
When adding a new third-party provider, you receive a list of available options, including built-in enterprise and social providers, custom, and SAML.
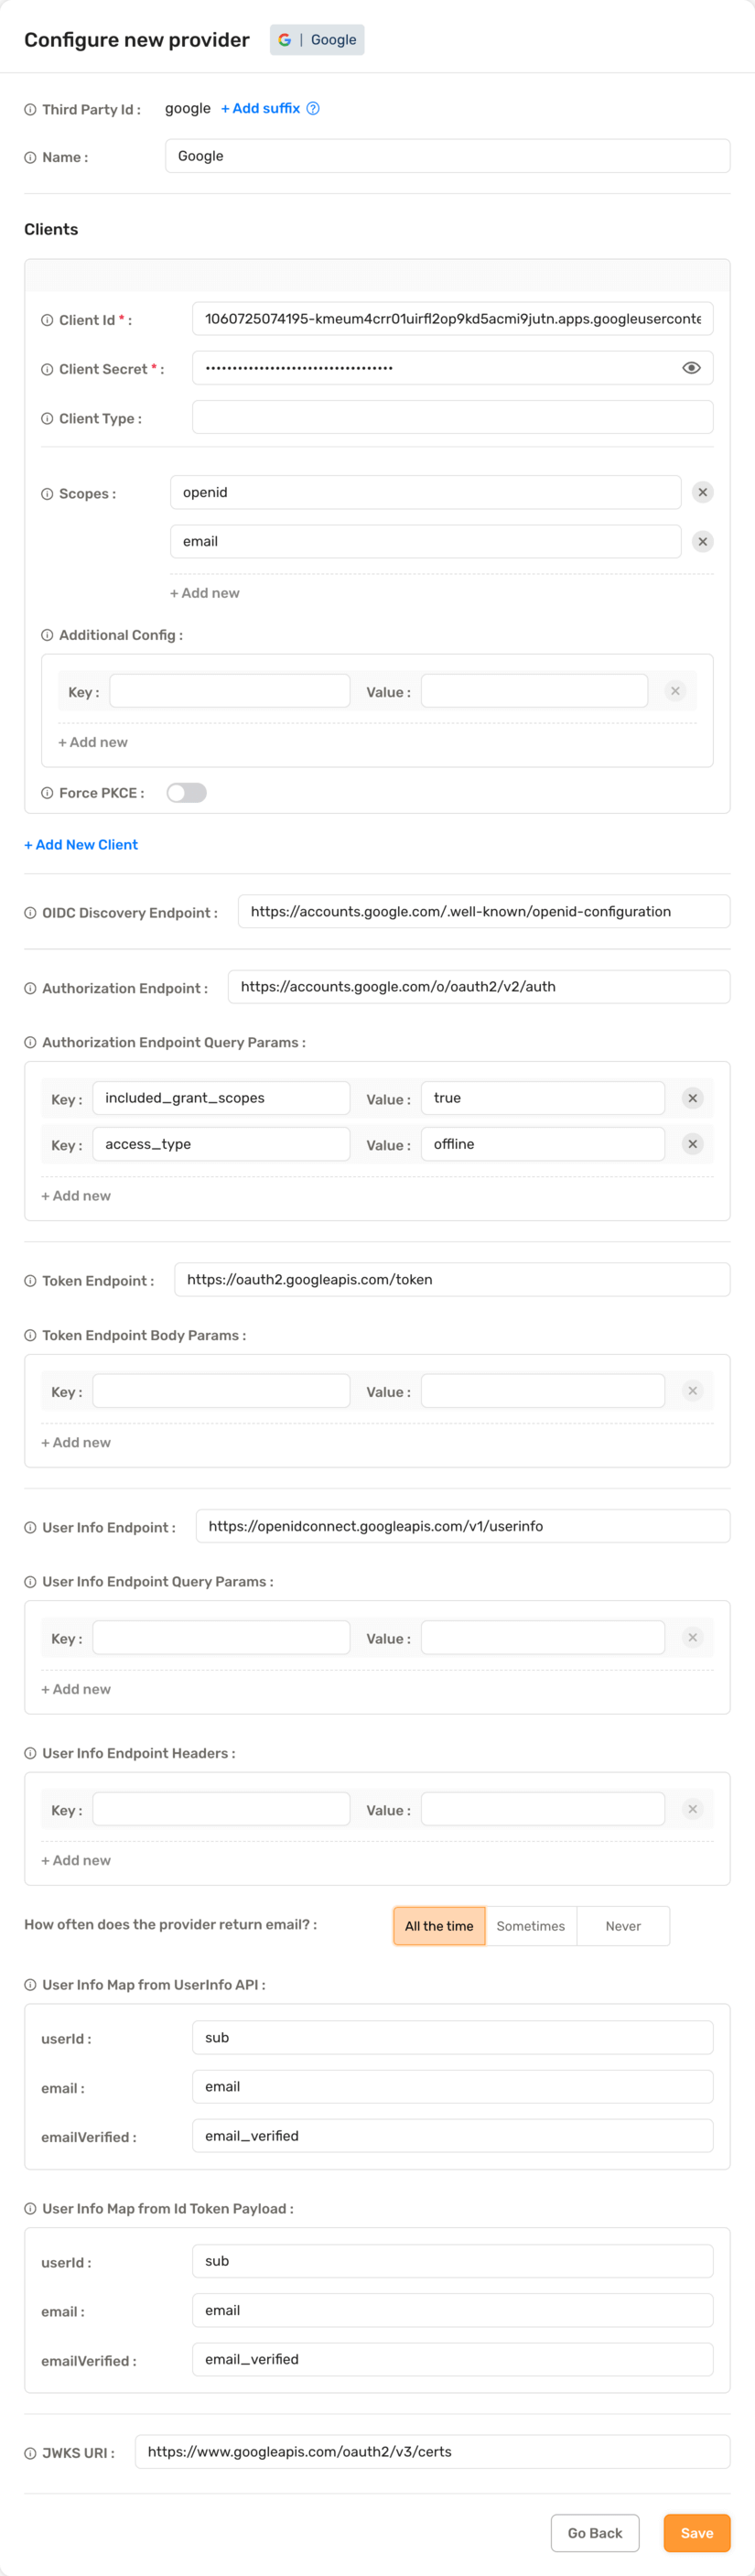
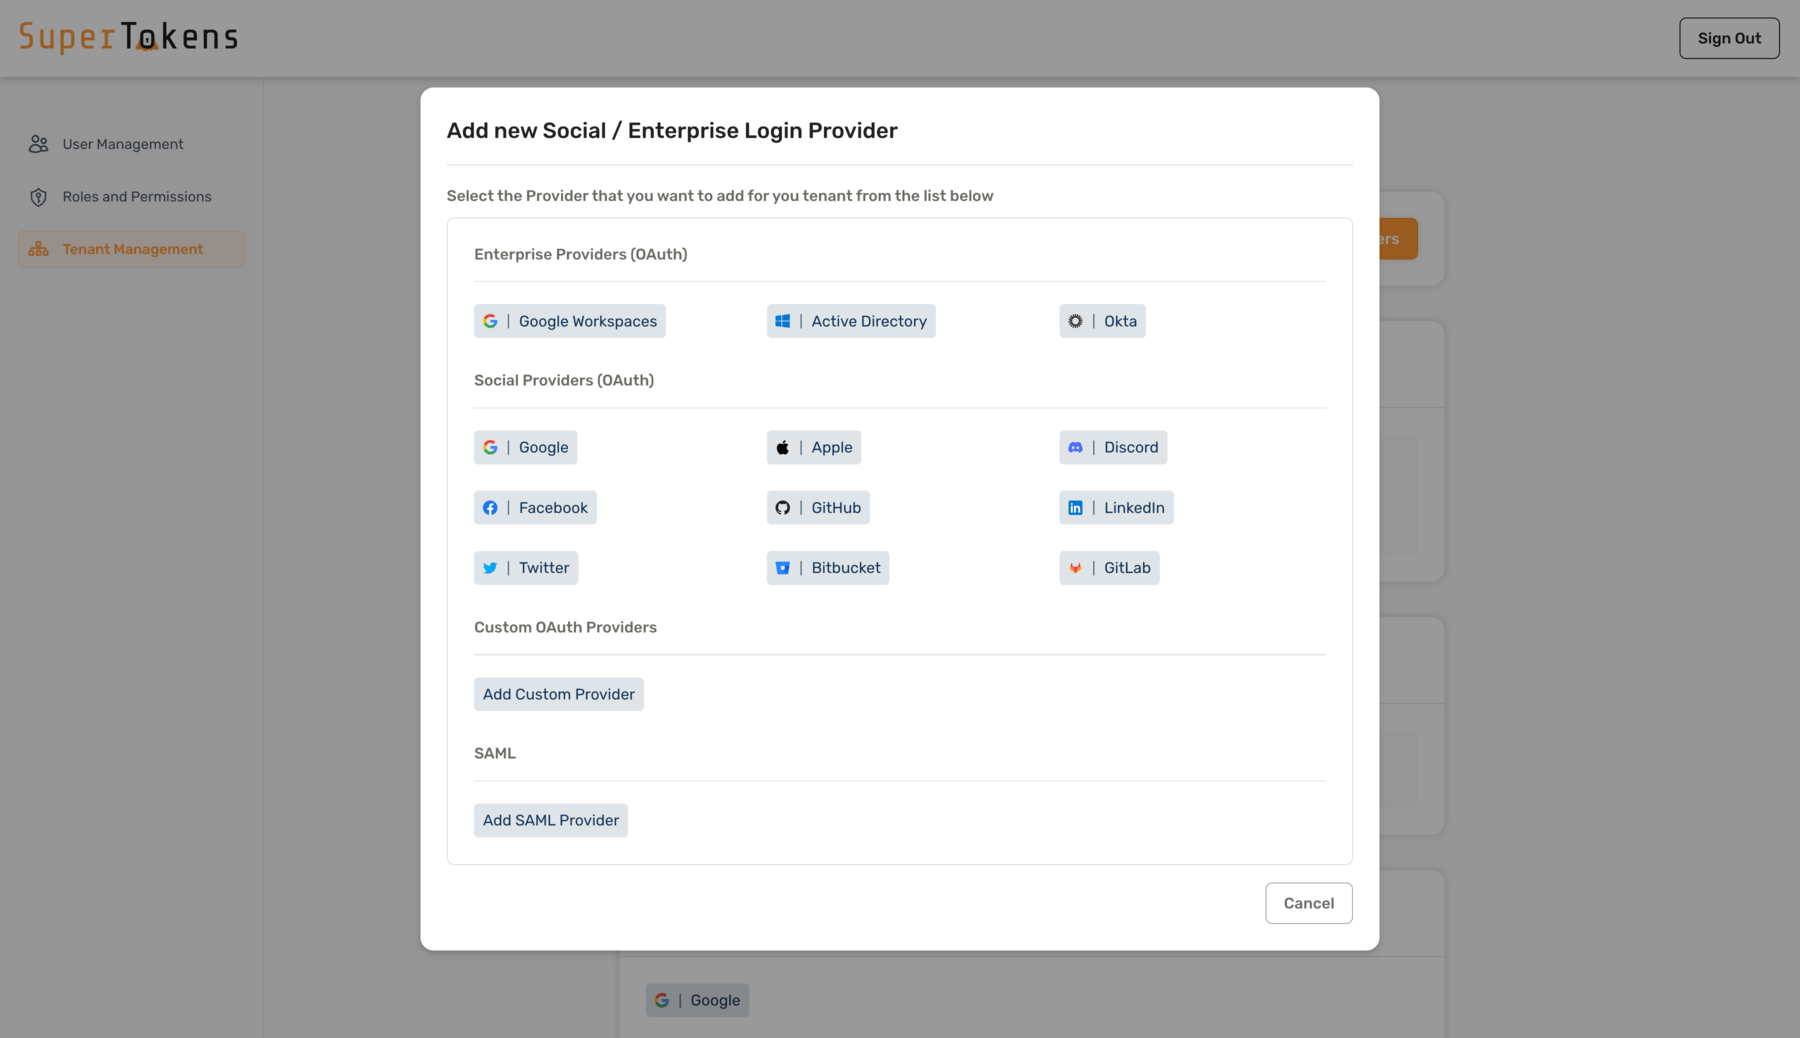 Upon selection of the desired provider, provide further details such as `Client ID`, `Client Secret`, etc.
 #### Enterprise providers
For the Enterprise providers, provide certain extra information before proceeding to the Provider details. For example, Active Directory provider requires a `Directory ID` before editing further details.
#### Enterprise providers
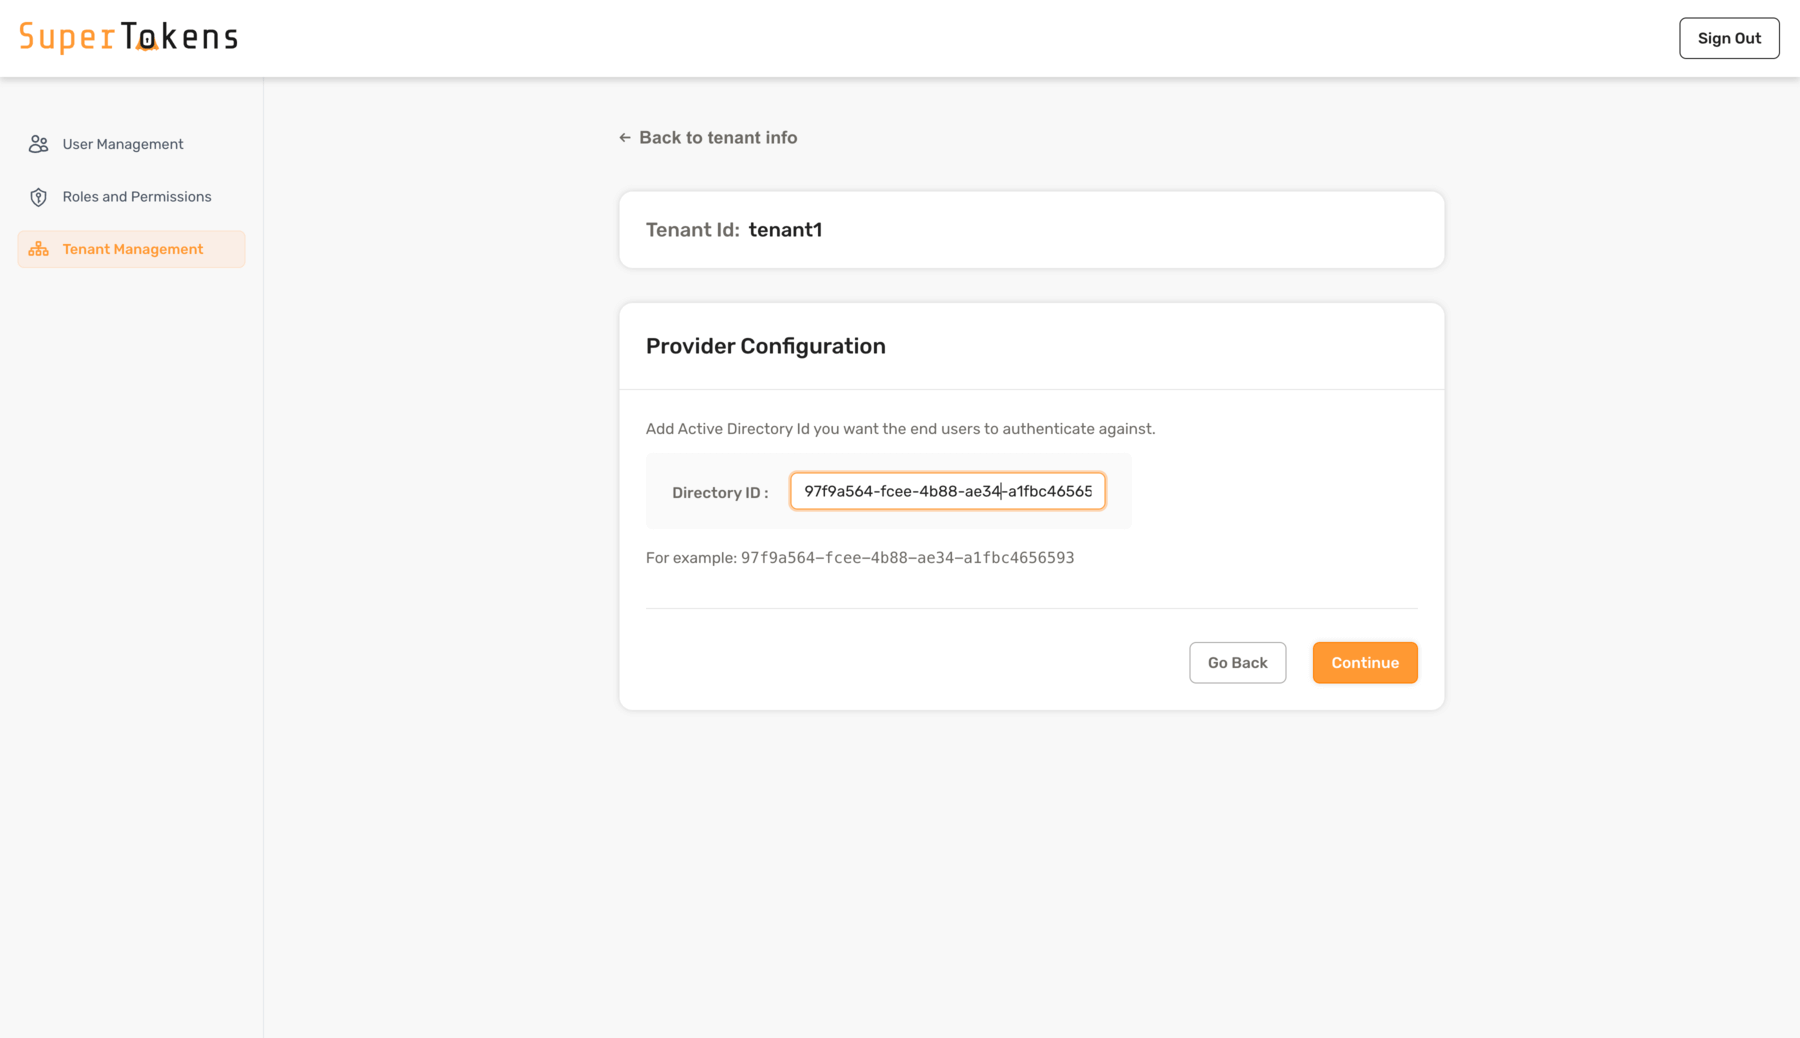
For the Enterprise providers, provide certain extra information before proceeding to the Provider details. For example, Active Directory provider requires a `Directory ID` before editing further details.
 #### Custom providers
If a Social/Enterprise provider is not available in the list of built-in providers, you can still use them by selecting the `Add Custom Provider` option.
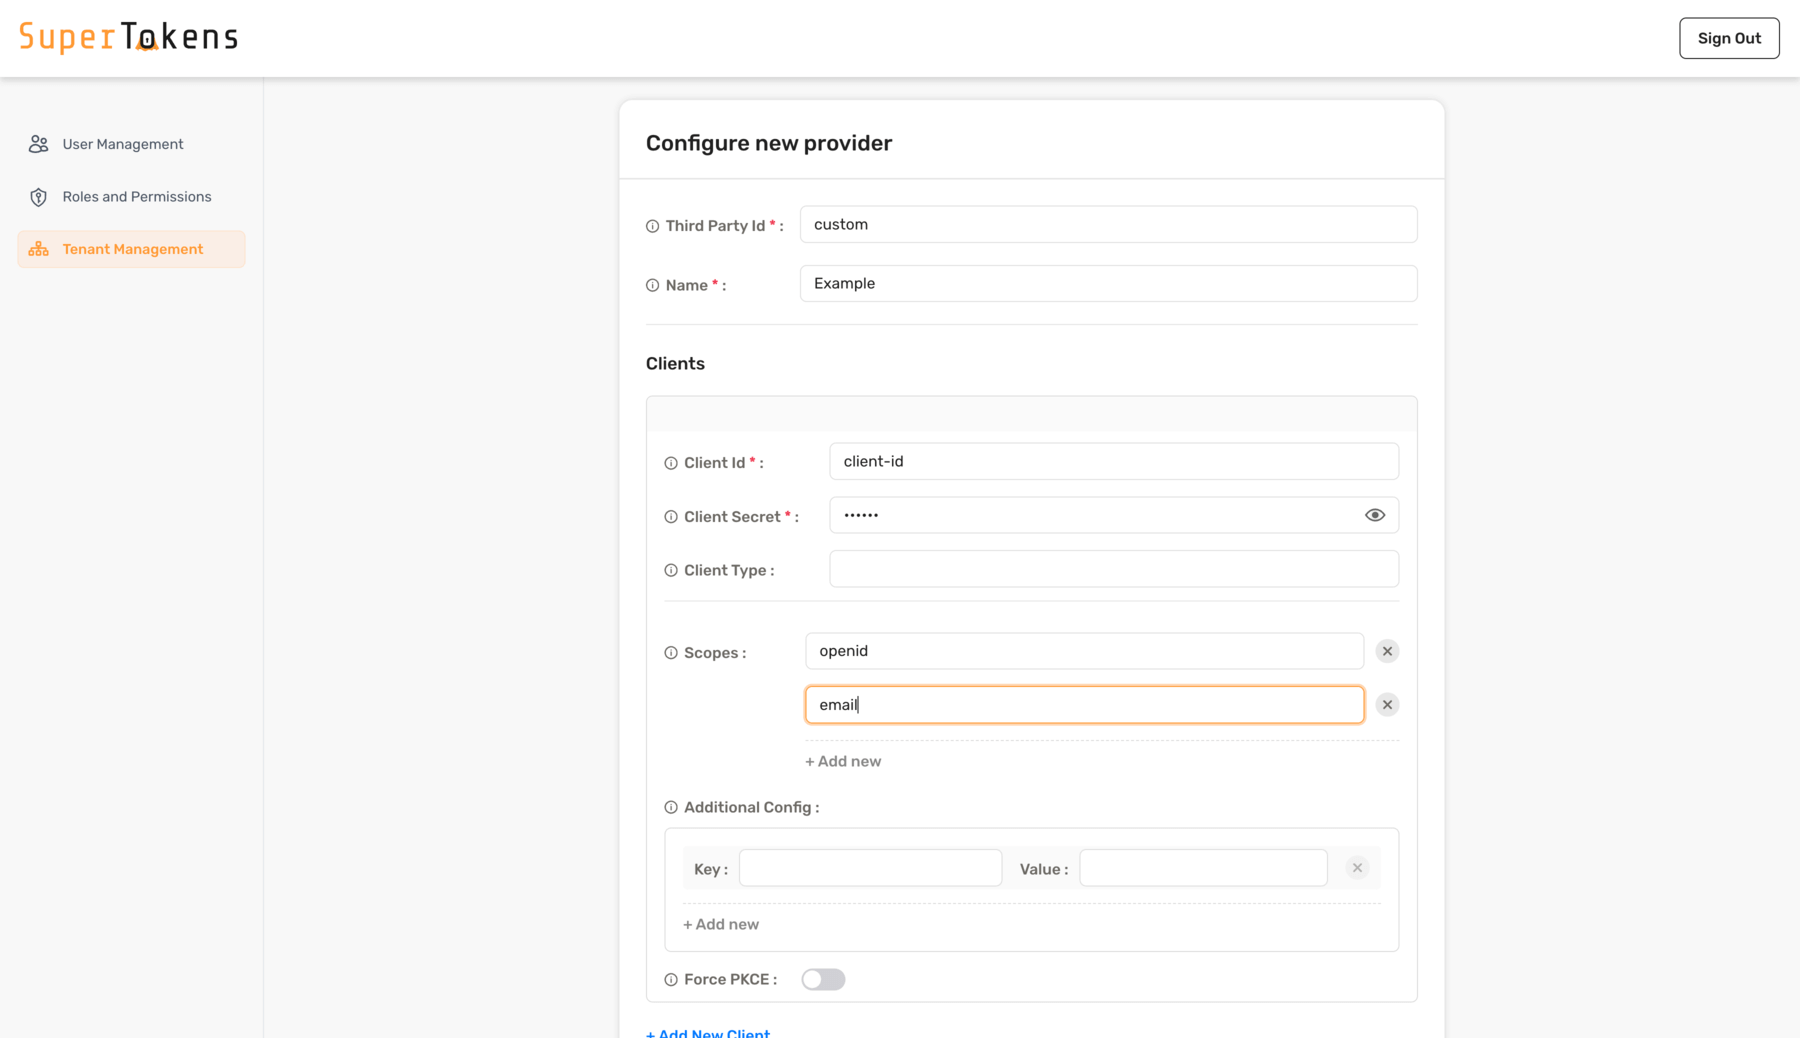
Start off by providing `ThirdParty ID`, `Name` and Client details such as `Client ID`, `Secret`, `Scope`, etc.
#### Custom providers
If a Social/Enterprise provider is not available in the list of built-in providers, you can still use them by selecting the `Add Custom Provider` option.
Start off by providing `ThirdParty ID`, `Name` and Client details such as `Client ID`, `Secret`, `Scope`, etc.
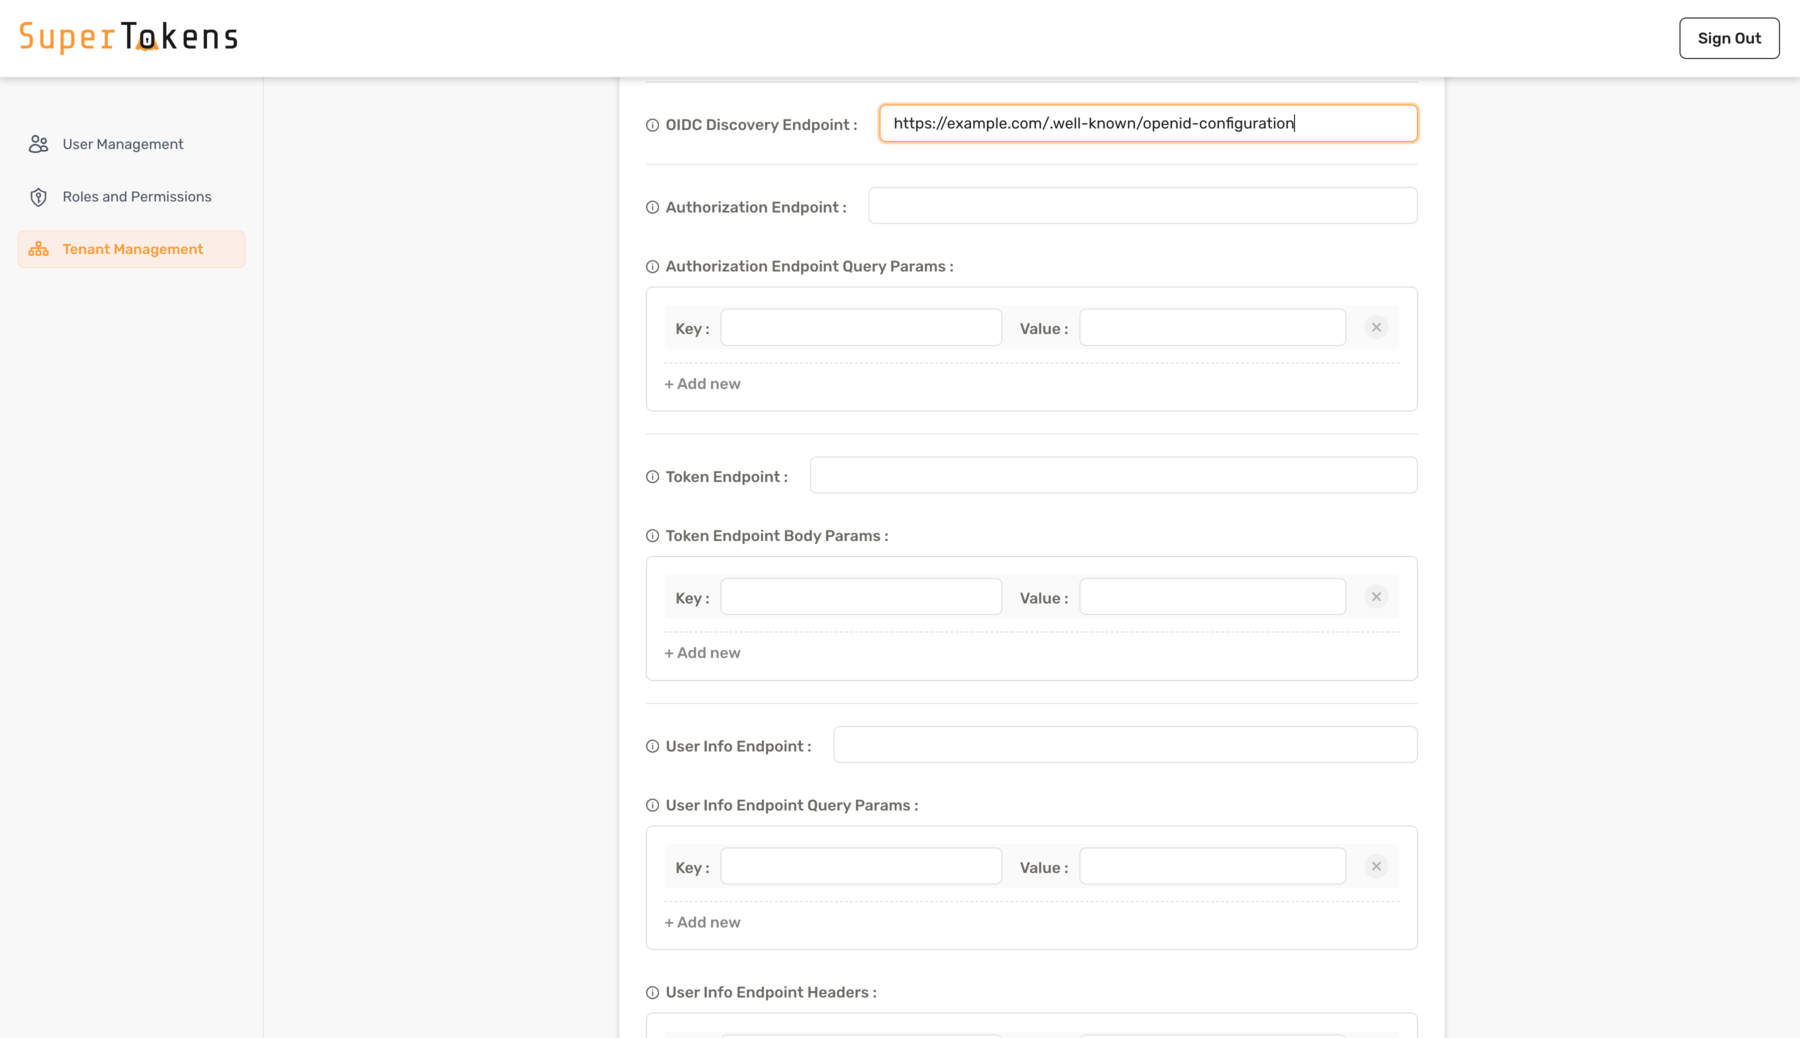
 If using an OpenID compliant provider, you could add the `OIDC Discovery Endpoint`. Otherwise, configure the provider by manually providing `Authorization Endpoint`, `Token Endpoint`, `User Info Endpoint`, etc.
 Finally, clicking on `Save` adds the Social/enterprise provider for the tenant.
#### SAML providers
To add a SAML provider, use the `Add SAML Provider` option. For more information on what is SAML and how it works with SuperTokens, refer [SAML docs](/authentication/enterprise/saml).
Upon selection, provide the `Boxy URL` and the `Boxy API Key`.
:::note[To use SAML providers, an additional Boxy HQ service is necessary. You can either self-host yourself or email for a managed instance. Details for them are also available on this page.]
:::
Finally, clicking on `Save` adds the Social/enterprise provider for the tenant.
#### SAML providers
To add a SAML provider, use the `Add SAML Provider` option. For more information on what is SAML and how it works with SuperTokens, refer [SAML docs](/authentication/enterprise/saml).
Upon selection, provide the `Boxy URL` and the `Boxy API Key`.
:::note[To use SAML providers, an additional Boxy HQ service is necessary. You can either self-host yourself or email for a managed instance. Details for them are also available on this page.]
:::
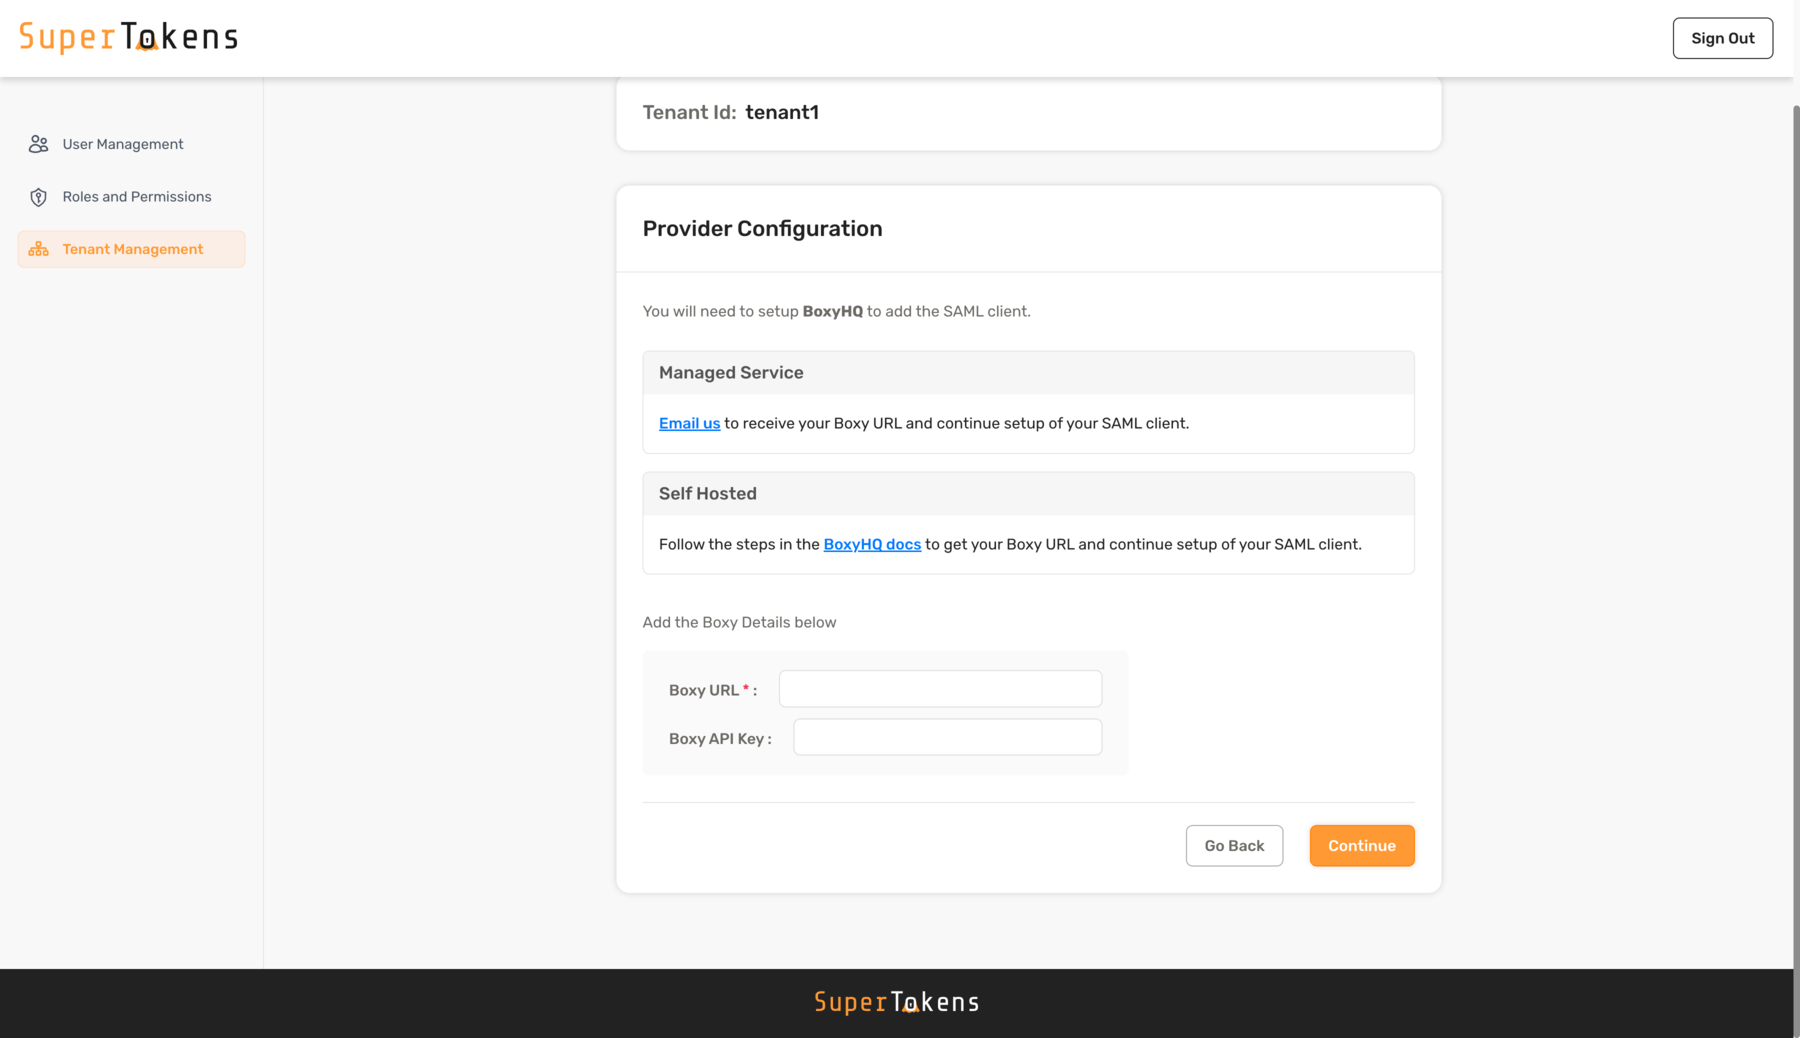 On continuing, you are further asked for the SAML configuration. You have an option to either provide SAML XML directly or via the Metadata URL from the Provider. Also, fill in other details such as `Suffix`, `Name`, `Redirect URLs` and click on `Save` to add the SAML provider.
:::warning[Adding ThirdParty suffix is not compulsory, however if you wish to add multiple SAML providers for a tenant, you need to add unique suffixes for each of them.]
:::
On continuing, you are further asked for the SAML configuration. You have an option to either provide SAML XML directly or via the Metadata URL from the Provider. Also, fill in other details such as `Suffix`, `Name`, `Redirect URLs` and click on `Save` to add the SAML provider.
:::warning[Adding ThirdParty suffix is not compulsory, however if you wish to add multiple SAML providers for a tenant, you need to add unique suffixes for each of them.]
:::